One single underestimated repair can instantly wipe out a house flip’s profit margin. Ask any experienced real estate investor, and they will likely share a horror story about a “simple cosmetic update” that transformed into a financial nightmare. Beginners often fall into the trap of using back-of-the-napkin math or relying on generic per-square-foot rules of thumb. Believing that every house can be renovated for thirty dollars a square foot is one of the fastest routes to an insolvent investment business.
The real estate market leaves very little room for uncalculated risk. When you make an offer on a distressed property, your purchase price must reflect the true scope of work required to make the home safe, marketable, and profitable. Calculating those figures accurately before you sign a purchase contract is not about guessing contractor quotes out of thin air. Instead, it requires a systematic, top-to-bottom pre-purchase evaluation framework that turns terrifying structural unknowns into clear, line-item line items.
To protect your capital, you must learn how to read a building like a story. Every crack in the drywall, water stain on a ceiling joist, or outdated utility connection reveals something about how the home was treated over the last few decades. By shifting from emotional enthusiasm to disciplined, forensic auditing during your walkthroughs, you can establish realistic rehab budgets, negotiate aggressive purchase prices, and safeguard your expected bottom line.
Establishing Your Initial Walkthrough System and Visual Triage

When stepping onto a target property for the first time, it is easy to get distracted by terrible wallpaper, avocado-green appliances, or outdated shag carpet. These visual distractions are irrelevant to your initial financial evaluation because cosmetic fixes are easy to quantify. The true threat to your rehab margin lies in the structural shell and environmental health of the building. Establishing a logical, top-to-bottom spatial flow allows you to triaging the property’s physical shell in under thirty minutes.
Starting From the Sky Down
Before walking through the front door, walk across the street and take a long, deliberate look at the building’s silhouette. A sagging ridge beam, bowed exterior walls, or uneven eaves immediately point to structural shifts or prolonged exposure to weight and moisture. Look closely at the condition of the roofing material, pay attention to missing shingles, and examine the flashing around valleys and plumbing stacks. If you notice severe granular loss, multiple layers of old asphalt, or daylight visible through the attic rafters, you must budget for a full teardown. In complex cases involving steep pitches, historical tiles, or severe structural distortion, bringing in a residential roofer during your inspection contingency period ensures you capture accurate labor rates and material costs rather than relying on standard local averages.
Spotting Active Environmental Hazards
Once inside, train your eyes to scan the intersections where walls meet ceilings and floors. Discoloration, peeling paint, or damp odors suggest ongoing moisture intrusion that can rot subfloors and foster mold growth behind drywall. If a basement or crawlspace shows dark tide marks along the concrete foundation walls, the property has experienced standing water or severe hydro-static pressure. Remediating these areas requires far more than a coat of stain-blocking primer. You must account for dynamic water damage repair expenses, which frequently include tearing out saturated insulation, replacing compromised rim joists, installing sumps, and rebuilding damaged wall framing.
Evaluating Heavy Mechanical and Electrical Infrastructure

After evaluating the building’s physical envelope, move directly to the utility rooms. Mechanical, electrical, and plumbing systems represent the heavy infrastructure of a property. These components draw significant scrutiny from home inspectors, appraiser underwriters, and retail home buyers alike. Failing to spot an outdated or unsafe utility system can result in thousands of dollars in unbudgeted change orders midway through your project.
To keep your walkthrough efficient, follow a strict visual sequence. Begin by examining the roof and exterior structure, move down into the basement or crawlspace for moisture checks, audit the main electrical service, and finish by inspecting the primary HVAC system and ductwork.
Auditing Modern Amp Requirements
Open the door to the main service panel and check the main breaker rating. Older properties frequently run on legacy sixty-amp or one-hundred-amp fused service configurations. Modern households operate multiple high-draw electronics, modern kitchen appliances, and electric vehicle charging stations, making two-hundred-amp service the baseline standard for retail resale homes. If the panel contains glass fuses, exposed cloth-covered wiring, or brands notorious for internal failure, you must account for a complete electrical panel replacement. Beyond swapping the physical panel box, factor in local municipality permit fees, utility disconnect costs, and potential wall repairs if wire runs must be pulled up to modern building codes.
Testing HVAC Efficiency and Remaining Useful Life
Next, locate the heating and cooling equipment. Look for the manufacturer date code on the data plate attached to the air handler or condenser unit. The average lifespan of a residential split system ranges from fifteen to twenty years depending on usage patterns and regular filter changes. If the system utilizes outdated refrigerants or shows heavy rust along the drip pan, simple maintenance will not suffice. However, if the unit is less than ten years old, you might only need to bring in a contractor for a standard AC service visit to clean the coils, check line pressure, clear condensate lines, and certify operational efficiency for future buyers.
Here is a quick checklist for diagnosing utility systems during a brief walk-through:
- Check the main service panel brand and breaker capacity.
- Search for cloth-covered knob-and-tube or ungrounded wiring connections.
- Record the age and physical condition of the furnace and outdoor compressor.
- Verify whether ductwork is insulated, properly sized, and free of sagging flex-pipe runs.
Diagnostic Plumbing and Subterranean Pipe Assessment

Plumbing issues are notoriously tricky for real estate investors because the vast majority of the system is buried underground or sealed inside wet walls. While a leaky faucet or a cracked porcelain sink is inexpensive to fix, main supply line failures or collapsed waste stacks can derail your budget. Diagnosing subterranean and hidden mechanical runs requires specialized diagnostic methods and a clear understanding of the home’s operational mechanics.
Inspecting Main Sewer Lines for Blockages and Roots
To evaluate a property’s waste management system, locate the main sewer cleanout. In homes built prior to the late 1970s, underground sewer lines were often constructed using cast iron, clay, or fiber conduit materials that deteriorate over time. Tree roots infiltrate tiny fissures in these old pipes, causing chronic backups, offset joints, or total structural collapse under the driveway or lawn. Pay a qualified specialist to run a video camera down the line during your due diligence phase. If the pipe is intact but heavily choked with grease, scale, or minor root intrusions, aggressive hydro-jetting can restore full flow without the need for expensive trenching.
Evaluating Chimney Stack Integrity and Ventilation
Do not forget to inspect vertical ventilation passages and masonry stacks that pass through the core of the house. A deteriorating chimney pose fire hazards and structural dangers if loose bricks dislodge and fall onto the roof. Look for spalling bricks, crumbling mortar joints, or absent flue caps along the exterior stack. If the interior flue liner is cracked or missing entirely, carbon monoxide can seep into living spaces. Budgeting for proper chimney repair—whether that involves tuckpointing external masonry, rebuilding the crown, or pulling a flexible stainless-steel liner down the flue—ensures the home meets fire safety standards before you bring it to market.
Calculating Exterior Structural and Protective Envelope Costs
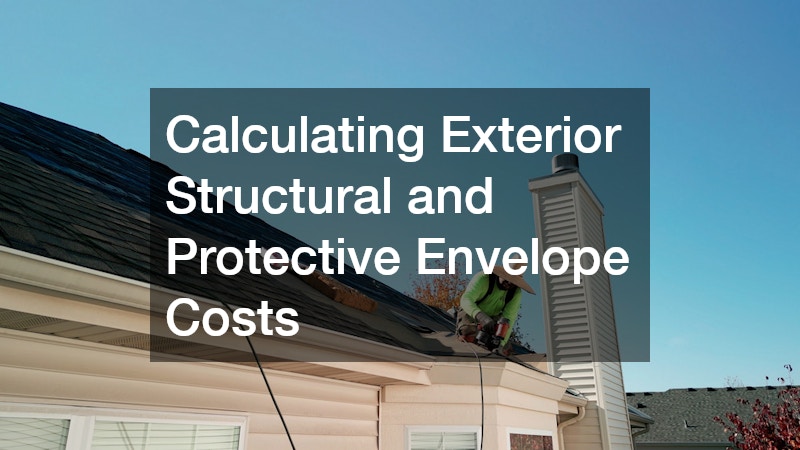
A property’s exterior serves two distinct purposes: protecting the interior framing from weather elements and creating immediate emotional appeal for potential buyers driving by. If the exterior looks neglected, prospective buyers will automatically assume the mechanicals were neglected as well. Accurate pre-purchase budgeting requires separating cosmetic exterior updates from critical protective repairs.
Determining Full Teardown Versus Spot Repair Scenarios
Begin your exterior cost calculation by taking detailed notes on the overall footprint and geometry of the home. Simple gable roofs with straight lines are significantly cheaper to re-roof than complex hip roofs featuring multiple dormers, valleys, and skylights. Measure the overall square footage and calculate the approximate roofing squares needed for the job.
If the underlying decking shows soft spots from attic inspection, factor in plywood sheet replacements alongside labor costs. When old layers are severely degraded, a full roof replacement becomes mandatory to satisfy the buyer’s home insurance underwriter. Always obtain clear quotes that break down tear-off disposal fees, ice and water shield installation, ridge vent upgrades, and new drip edge flashing.
Assessing Entryway Mechanisms and Overhead Access
Move your focus down to the garage and secondary entry points. Large overhead access doors represent both a major visual element of the facade and a crucial safety component. Test the auto-reverse mechanism and observe how smoothly the panel tracks move during operation. If the panels are buckled, rotted, or dented, or if the opener system lacks modern safety sensors, replace the entire assembly.
When evaluating the structure, ask yourself if the entryway or overhead door is structurally sound. If it is in good shape, budget simple cosmetics like sanding, painting, or adjusting tracks for smooth operation. If it shows severe damage or rot, budget a full replacement with new heavy-duty tracks and a modern opener package. A modern garage door yields one of the highest returns on investment of any exterior upgrade, making it an easy feature to justify within your budget. Make sure your estimate covers heavy-duty torsion springs, tracks, weather seals, and an updated belt-drive opener package.
Accounting for Subterranean, Landscaping, and Pest Mitigation
The land surrounding a house can hide significant expenses that novice investors often ignore. Improper site grading, overgrown trees pressing against exterior cladding, and hidden pest infestations can cause severe structural issues over time. Accounting for these environmental and ground-level variables protects your contingency fund from late-stage surprises.
Protecting the Foundation From Subterranean Pests
During your exterior and crawlspace walkthrough, inspect all exposed wood-to-concrete contact points for signs of insect damage. Look for shelter tubes constructed by subterranean termites along foundation walls, as well as fine wood dust left behind by wood-boring beetles. Structural damage caused by pests is rarely covered by standard property insurance policies, meaning the cost falls directly on your shoulders. If active colonies or hollowed floor joists are found, hire a licensed pest control company to perform localized chemical treatments, set up perimeter monitoring systems, or perform full property fumigation before you begin any interior carpentry work.
Auditing Site Irrigation and Exterior Water Management
Finally, evaluate how water moves across the property during heavy rainfall. Examine downspout extension locations, slope gradients, and existing lawn irrigation systems. Broken underground water lines can leach water directly toward the foundation footings, accelerating soil settlement and basement wall bowing. Turn on every zone of the irrigation system to check for hidden leaks, missing heads, and broken control valves. Performing necessary sprinkler repairs early in the project prevents newly laid sod from dying and stops subterranean water from saturating your newly renovated foundation perimeter.
Protecting Your Bottom Line Through Strategic Contingency Planning
Mastering repair estimates is not about predicting every single nail and piece of drywall down to the exact penny. Instead, it is about building a disciplined, repeatable framework that removes emotional bias from your acquisition process. By systematically auditing a property’s envelope, mechanical core, plumbing runs, exterior structures, and surrounding grounds, you transform intimidating unknowns into clear, manageable line items.
Always remember that every rehab project conceals hidden surprises behind its walls. Once you complete your initial cost assessment using the steps outlined above, add a mandatory fifteen to twenty percent contingency buffer to your final estimate. This financial cushion absorbs unexpected code updates, hidden material price spikes, and minor scope changes without jeopardizing your profit.
When you know your numbers inside and out, you gain an undeniable edge over competing investors. You can walk into negotiations with confidence, submit firm offers based on real contractor pricing, and walk away from deals where the math simply does not work. Protect your investment capital by doing the deep analytical work upfront, and let accurate repair estimations serve as the foundation of your house flipping business.